Hatch Patterns
Home > 08 Hatching Patterns > Hatch Patterns
Hatch Patterns
Hatching and patterns in polygon, wall layers and solid surfaces are associative. In most cases, when you move or modify hatched or patterned entities, the fill is modified exactly in keeping with the entity that encloses it.
Areas that can be Hatched
You can hatch any area that is surrounded by a polygon. The polygon may lie in any plane.
Remember that only the lower and upper bases of simple solids (prisms) are defined by ARC+ as polygons. To hatch the side of a simple solid, use the converting a solid for measuring and hatching (\solconv) command to convert all faces of the solid to polygons (see Polygons and solids). Alternatively, you can trace a polygon over it before using fill commands.
Hatch Parameters
To set a hatch pattern, you have to specify:
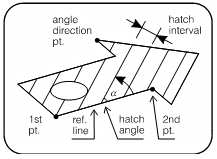
A reference line and a reference point for hatch angles
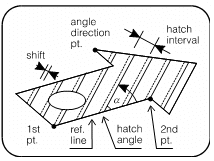
A hatch angle, interval and shift.
These terms are explained as follows:
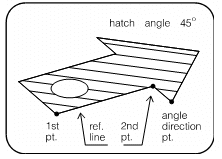
reference line Defined by two points. The hatch angle is measured from this line.
reference point A third point (not on the reference line) determining the side of the reference line to which angles are measured.
 IMPORTANT All three points must lie in the plane of a polygon to be hatched. Usually, it is easiest to use vertices of the polygon itself. To ensure precision, snap to the points.
hatch angle The angle between the hatch lines and the reference line. The angle is measured from the reference line in the direction of the reference point.
interval The perpendicular spacing between the hatch lines (e.g., 0.3m)
shift The offset in meters from the first point of the reference line. If you set the shift to 0, one of the hatch lines (or its extension) passes through this point. With any other shift, the hatch lines are offset by the shift distance.
Multiple Hatching and Crosshatching
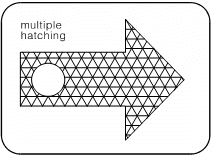
The hatching commands permit you to hatch the same polygon repeatedly, varying the hatch angle, interval or shift. For example, by varying the shift you create a double-line hatch, and by varying the angle you create crosshatching.
Associative Fill and Hatch Pattern Behavior

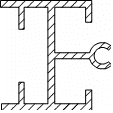
Hatch and fill patterns are now associative, that is they are automatically updated when the boundary, that was defined for their creation, is edited.
For example, if you create a hatch pattern inside a polygon and then stretch the polygon using the Stretch Points on an Entity by a Fence (\movef) command, the hatch pattern will be updated to fit the new shape.
The hatch is also updated if the original polygon is "opened" by the Deleting Polygon Segments (\pldel) command, continued by any of the polygon creation commands and then closed.
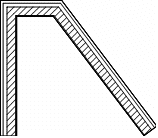
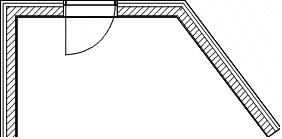
 NOTE The degree of associativity is dependent on the method used to define the area, ranging from the fill of a closed polygon (best associativity) to the area bounded by various entities (least). You can apply associative fills to regular polygons on any plane. Areas enclosed by polygons and areas surrounded by edges can be filled with associative hatches and patterns only when they are located on the current working plane.
Related Topics
