Hatching a Polygon
Home > 08 Hatching Patterns > Hatching a Polygon
Hatching a Polygon
Hatch an enclosed area or polygon.
\hatch
Additional options for defining the perimeter of an area to be hatched have been added to the hatching command:
Enclosed area
Polygon by edges
Polygon
Selection group
Enclosed area An area bounded by entities such as lines, polygons, short help lines and placed objects in continuity. You can indicate multiple enclosed spaces as well (which are considered as a single continuous polygon).
Polygon by edges Consecutively identified entities or parts of entities that form the boundary of the area to be hatched. If the area is not totally enclosed the system will close the perimeter by optionally extending the first and last elements or by directly linking the first and last points).
Polygon An area within a closed polygon entity
Selection group A series of selected polygons, as in the Hatching Selected Polygons (\hasel) command.
Choose one of the options.
Press Enter to define the parameters for drawing the hatch.
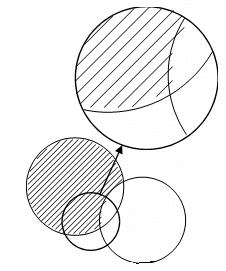
Define the reference lines to measure the hatch angle and the reference point for hatch direction. If you press Enter you can fill the area with the same hatch as an existing sample by indicating it. (new option)
Specify the hatch angle, interval and shift. Indicate the polygon to be hatched. You are prompted to define additional areas or additional hatches.
 NOTE This option works on the current working plane only.
 HINT If the command does not identify an area that you know to be enclosed, try changing the advanced settings. The tolerances may be too small (or large) for the scale of your model.
Changing the Default Hatch Settings
If you choose the <enter> for settings option, you can control the hatch tolerances for the following:
overlapping points Establish the minimum distance between two points (in mm), less than which the system recognizes them as a single point (e.g., to determine whether a gap between intersecting walls is detected).
planar accuracy Set the value (in mm) for adjacent segments that reside in different planes (z). The system closes the plane according to the value set in this field.
segment extension Establish the amount (in mm) adjacent segments will extend towards each other to be considered joined.
size of arc segment Determine the size (in mm.) of each segment of the arc.
no. of segments Determine the minimum and maximum segments in an arc (with fewer segments the system processes the command more rapidly and smaller files are created; increasing the number of segments smoothes the curve but also creates larger files).
search factor Automatically increase the factor by which the segments are closed by using the Search Factor option.
factor Determine the factor by which the segment along z and along each line is closed.
no. of loops Determine the number of times to increase the factor.


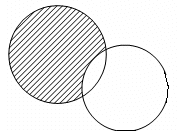
Before Adjusting Tolerance After Adjusting Tolerance
Troubleshooting Associative Fills
Repair the hatch and pattern fill of an area enclosed by edges after modifying the borders.
\updfill

When you modify the borders of an area enclosed by entities, the hatch and pattern fill may not change accordingly. Update the fill to fit the new contour.
You can also use this command to transfer the entire fill from one enclosed area to another—the hatching and patterns are moved (not copied) to the enclosed area you indicate.
Removing Associativity of Hatches and Patterns
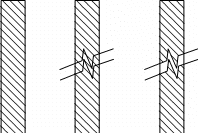
Break the associativity between a hatch or pattern and its polygon.
\exhatch
Indicate the hatch or pattern.
If more than one hatch exists, you are asked if you want to detach the highlighted one only or all the hatches associated with the polygon.
