Render
Render
You can render your model at any stage and continue to work on the rendered model. When you apply the surface colors and textures in this module, they override the original colors of the entities. Any entity that is not rendered retains its original color (material default) but is shaded with the rest of the model according to the current lighting parameters.
How to enable rendering mode
/render
To enable render mode and camera sections manager run the following command or click the ![]()
icon and select render.
In ARC+ the render options are visible when render mode is enabled. To enable render mode follow the instructions below.
|
|
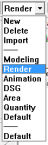
Select render mode from the drop down menu in the upper left corner. |
|
The render window will now open and your model will be visible in a real-time rendered image. |
Now your project will be visible in the default camera. To set up multiple views you can set up additional camera's.
You can continue to create using the ARC+ creation commands and edit your model in this mode, and all frames will be updated in real-time.
> How to set up additional camera's
|
|
Frame setting will allow you to set the real time rendering settings for this particular frame. |
|
|
The lights setting will alow you to set the intensity of eye, sky and sunlight. |
|
|
Offset Settings |
|
|
This option will generate a rendered image in your project folder. |
|
|
Here you will be able to set an viewing angle of your frame quickly. |
|
|
Initiated the Material Studio for the object. |
|
|
Initiated the Material Studio for the colour. |


> To check out different material settings and general information about different styles click here.