Preparing the image
Home > 27 ARC Photo > Preparing the image
Preparing the image
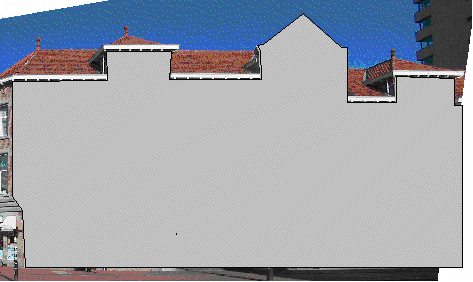
To avoid too much distortion or unwanted results you must understand better the process of rectification and limitation that might occur. You can only rectify and be sure of measures within one coplanar plane in reality.
This is the coplanar surface in this image shown grey:
This means that for example roofs and wholes that have depth are not suited to measure if they are in another spatial plane. For each plane a image has to be taken.
For the best results please make sure the following:
Try to avoid low angle distorting lenses like fish eye.
Set your camera to the highest resolution possible
Set the camera to standard color quality. It is less important to have much color depth and quality of file format. A jpg can do the job very well. It will give small files thus working more fast both reading and working on the file in ARC+
Make images with a maximum of 30 degrees to the taken surface to rectify. Try to be as much as possible in front of the object or elevation.
If your goal is accurate scaling and measurement, a trick to measure fast can be to put 1 vertical and one horizontal element in reality in the real environment. In ARC+ photo you will simply pick the points on these elements in the photo.
If your goal is to have textures for rendering make sure the surface is lighted without shadows. This will avoid unwanted repetition effects in render software's and internal render mode. Also take the material surface as big as possible.
If your camera cannot take the whole building, make more images with 1/3 overlap. Later you can combine the images to have one drawing in the end.
Avoid objects to be in front of important parts. Either displace them before taking the image or make more images from different point of views.
|
|