Placing End Conditions
Home > 06 Openings > Placing End Conditions
Placing End Conditions
Select an end condition and attach it to an opening and a wall.
\eplace
If you set a current opening, indicate the opening to which you want to add or replace the end condition, or press Enter to change a selection group. If you have not previously set an end condition as the current, the system first transfers you to the new Setting a current end condition (\eset) command.
Then indicate the side of the opening:
Outside, near the end of the opening for one side
On the opening itself to update both sides
The end condition last selected in the current work session replaces the end conditions of the indicated opening. Alternatively you can press Enter to reset the end condition. If you do this, the library of end conditions appropriate to the opening wall type is displayed to select a different end condition.


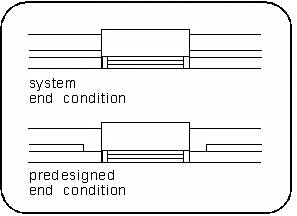
Until you specify a library end condition, the system end condition is the current default. To set a new current end condition choose the reset option.
 HINT If you do not remember which end condition is attached to the current opening or what wall type it was placed in, it is recommended to press Enter to reset the end condition. This option presents you with the end condition library appropriate to the current wall type.
 NOTE You can use asymmetrical end conditions. If the attach control points of the end conditions are not the same value on the y axis, the opening is attached to the last placed end condition.
