Dragging the Object into Position
Home > 15 Placed Objects and Libraries > Dragging the Object into Position
Dragging the Object into Position
\drag
The chosen object appears attached to the cursor. Note that only part of a large object may be displayed. Choose to drag the object itself or an enclosing box representing it.
 HINT It is recommended to use the enclosing box as it is easier to drag.
Drag the object to the desired position and click the mouse button. The object is placed at this position, while a copy of the object remains attached to the cursor for placing at additional positions, if you desire. Activating a new command clears the object from the cursor.
While the object is still attached to the cursor you may press shortcut keys to do the following:
Change the direction
Change the symmetry
Change the angle
Reset the angle
Increase/decrease the size
Reset the size and orientation
Set the angle and size increments
These options are described below:

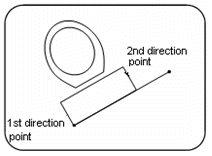
direction
Press the Enter key twice.
Define two points. The original X axis of the object aligns to the imaginary line connecting the two points.
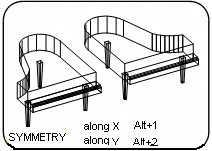
X-symmetry
Alt+1
The object is reflected along the X axis.

Y-symmetry
Alt+2
The object is reflected along the Y axis.
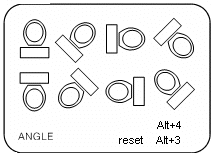
Reset angle
Alt+3
The object returns to its original angle.

angle Alt+4
The object rotates about its origin by the current angle increment (default = 10°).

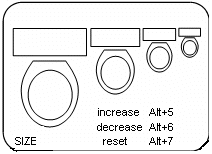
Increase size
Alt+5
The object increases in size by the current size increment (default = 1.25).
Decrease size
Alt+6
The object decreases in size by the current size increment (default = 1.25).
Defaults
Alt+7
The object returns to its original size and orientation.
Set angle and size increments
Specify whether you wish to set the angle or the size increment. These increments are the amounts by which the angle and size are changed each time you press Alt+4, Alt+5 or Alt+6 during placing.
orientation
Alt+8
The object is oriented according to the origin point one of 4 corners, center, or original position.
