Defining or Editing a Wall
Home > 05 Walls > Defining or Editing a Wall
Defining or Editing a Wall
You can use this function to create or modify a wall type in the selected library. While setting a wall type, you can set default fill for every wall layer as well as placing layer.
To define or edit a wall type, click on the Edit button in the dialog box for selecting current wall type. Following dialogue box will appear:
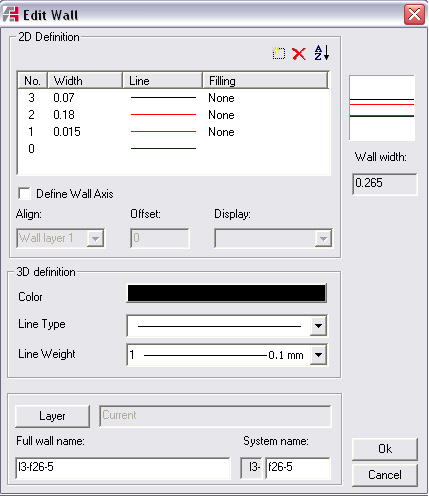
Using this dialog box, you can:
 Add a wall layer.
 Delete a wall layer.
 Reverse wall layers order.
 NOTE: A newly created wall has one single default layer of 30 cm. A wall can consist of maximum 7 layers.
To define a new wall type, follow the steps given below:
Specify the thickness of every layer and the attributes of lines (color, type, thickness) surrounding them. Attributes of the first line are used to represent the 3D volume of wall.
You can define the fill type of a layer by a pattern or a hatch in the filling column, near every layer number.
If you wish, define the parameters of wall axis: alignment and display.
The default is al set to 1 for 3D presentation. When importing old walls the first layer attributes are set as 3D attributes by default. If you prefer a different setting of the 3D wall you can choose all 3 attributes color, line type and thickness. The chosen settings are also the settings of the opening when placed in a wall.
Choose the default placing layer for this wall type using the dialog box for layer selection.
In the Full wall name field, enter the wall type name (up to 80 characters)
Also, enter a system name up to 5 characters.
 NOTE: The system name ensures compatibility with the previous versions. A long name offers better readability while selecting the current wall type.
 IMPORTANT: If the system name has already been used in any of the libraries, the software will prompt you to overwrite the previous setting of the wall type. Double system names of walls cannot exist, even in different libraries.
Setting the Hatch of a Layer
When you choose to fill a layer with hatch, the system displays following dialog box:
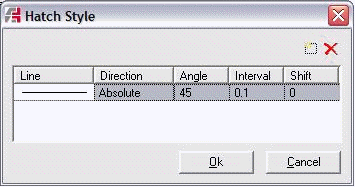
Using this dialog box, you can:
 Add a hatch style
 Delete a hatch style
You can overlap as many hatch styles as you want on a wall layer. Click Add: a new line is inserted in the table in which you can specify the line attributes (type, color, width) by clicking on the line sample and then on .
.
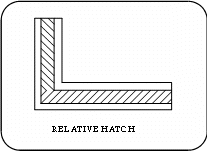
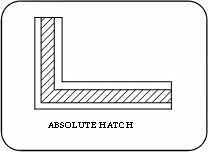
Specify whether the hatching direction should be relative or absolute:
|
relative
|
The hatch is created on every wall with the angle specified for the wall itself. |
|
absolute
|
The hatch is created with the angle specified with respect to X axis, irrespective of the wall angle. All the walls will thus be hatched with the same angle. |
If you use relative hatch on a wall arc, it will be drawn as follows:
In an angle of 0 degrees, producing radial lines
In an angle of 90 degrees, producing concentric lines
All the other angles will be executed as absolute with respect to X axis
Specify the angle of hatch (0 to 360 degrees). Enter the space between the hatch, which forms the space between lines and hatch offset i.e. the offset of the first line. For further information on these parameters, see Hatches and Patterns.
Setting the Pattern of a Layer
When you choose to fill a layer with a pattern, the system displays following dialog box:
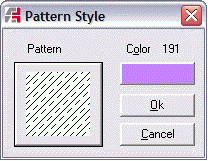
Click on the Pattern sample to access the libraries and search for the pattern to use. Then open the color selector by clicking on the colored rectangle to choose a new color for your pattern. You can choose between the 255 colors of ARC+. Click on the color of your choice, then click OK to validate it

