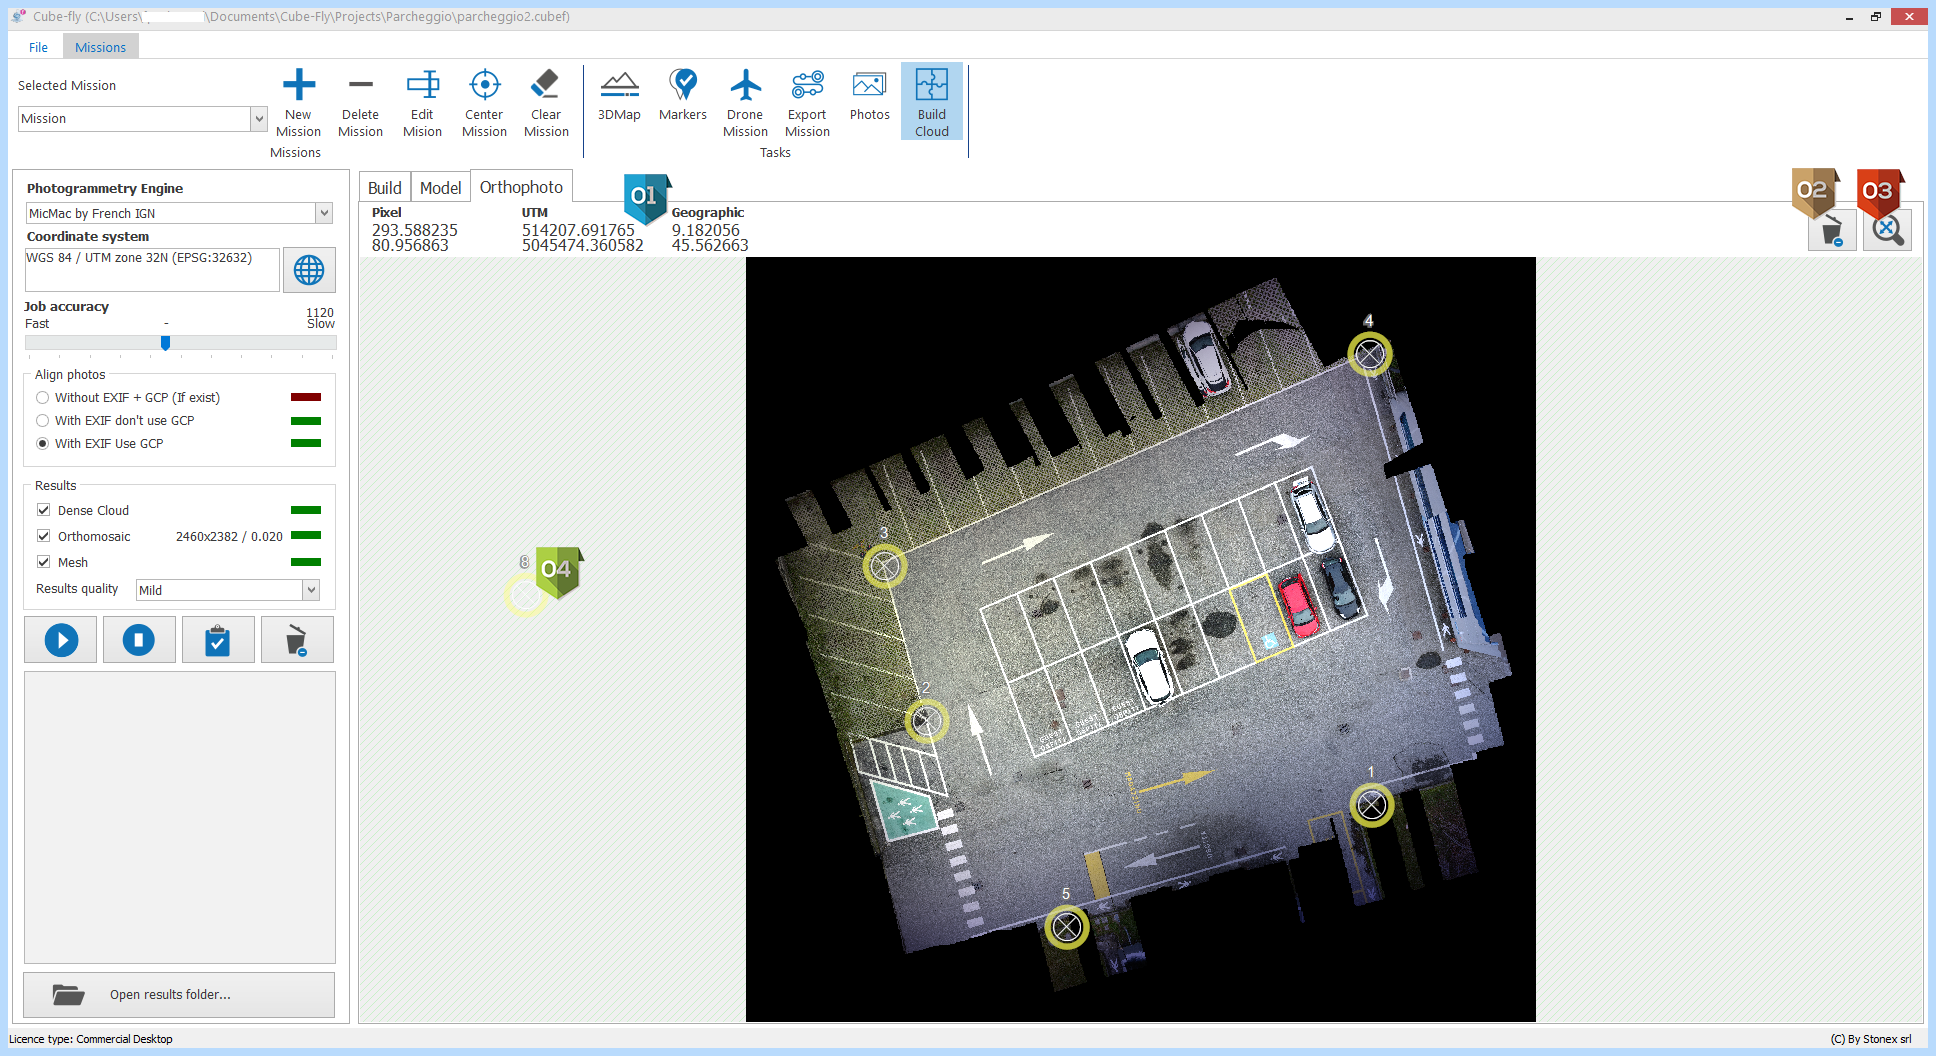
Orthophoto
Orthophoto tab can be visible only if it has calculated from the Build tab.
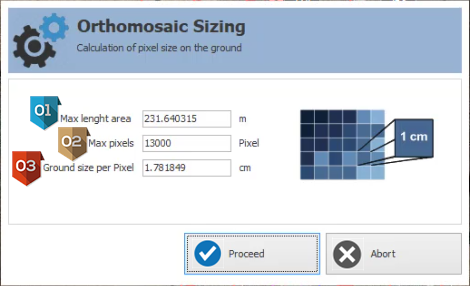
Before the creation, you have to set some parameters.
NOTE: to can calculate the photomosaic it is highly suggested to have defined in the project the boundary of the mission. Automatically, you will have defined some default settings.
|
Max dimension of the area to represent on the orthophoto. |
|
Maximum number of pixels. |
|
Dimension of the ground to be represented in a pixel. |


|
Zone where are displayed the coordinates in pixels, UTM and Est/North. |
|
Delete all the measures made on the ortophoto. |
|
If a zoom has been performed, it zooms out, fitting the orthophoto in the window dimension. |
|
Markers used to build the model are shown. |

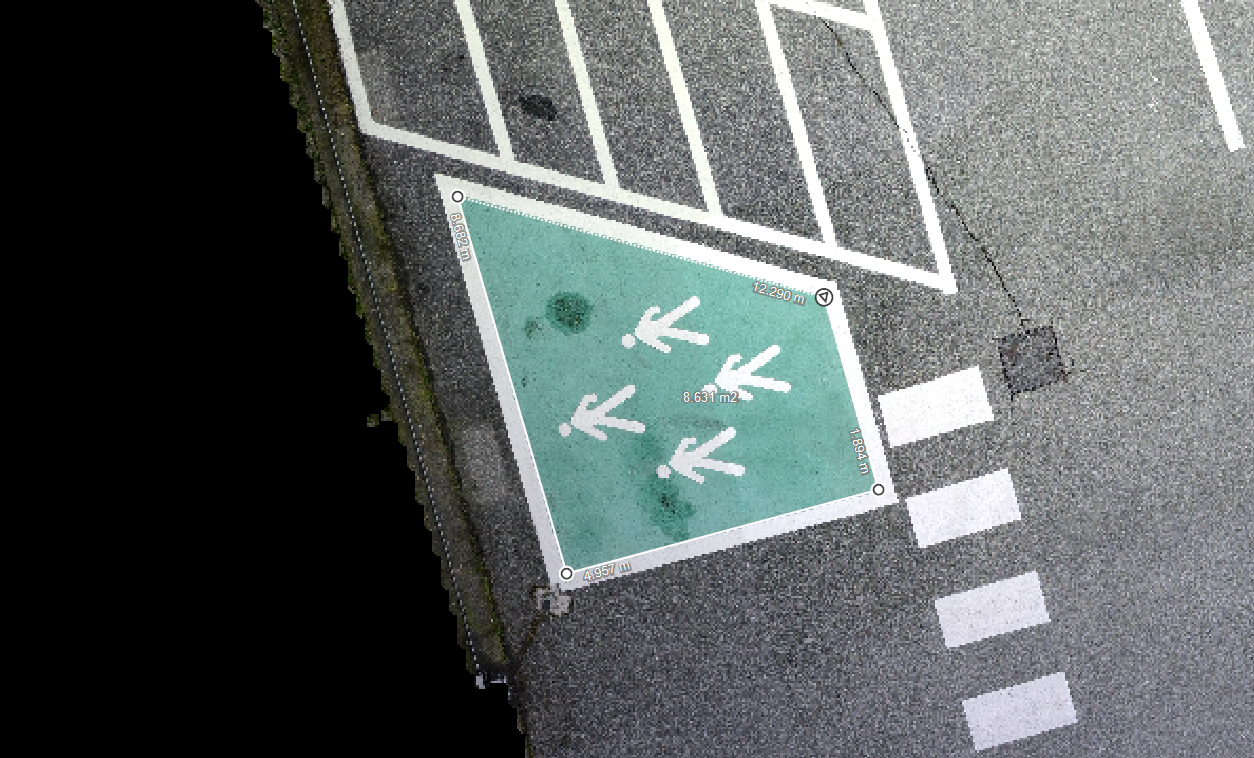
Get measures on orthomosaic
It is possible to get measures on the orthomosaic, drawing segments.
To draw them, simply click with the mouse: a white dot will be created. If you want to modify the position of the vertex, you can drag it to the correct position. Otherwise, click on it again to delete.
The progressive distance and the area is shown.
Navigation
Rotate |
|
Drag the orthophoto. |
Scroll |
|
Zoom in/out the othophoto. |