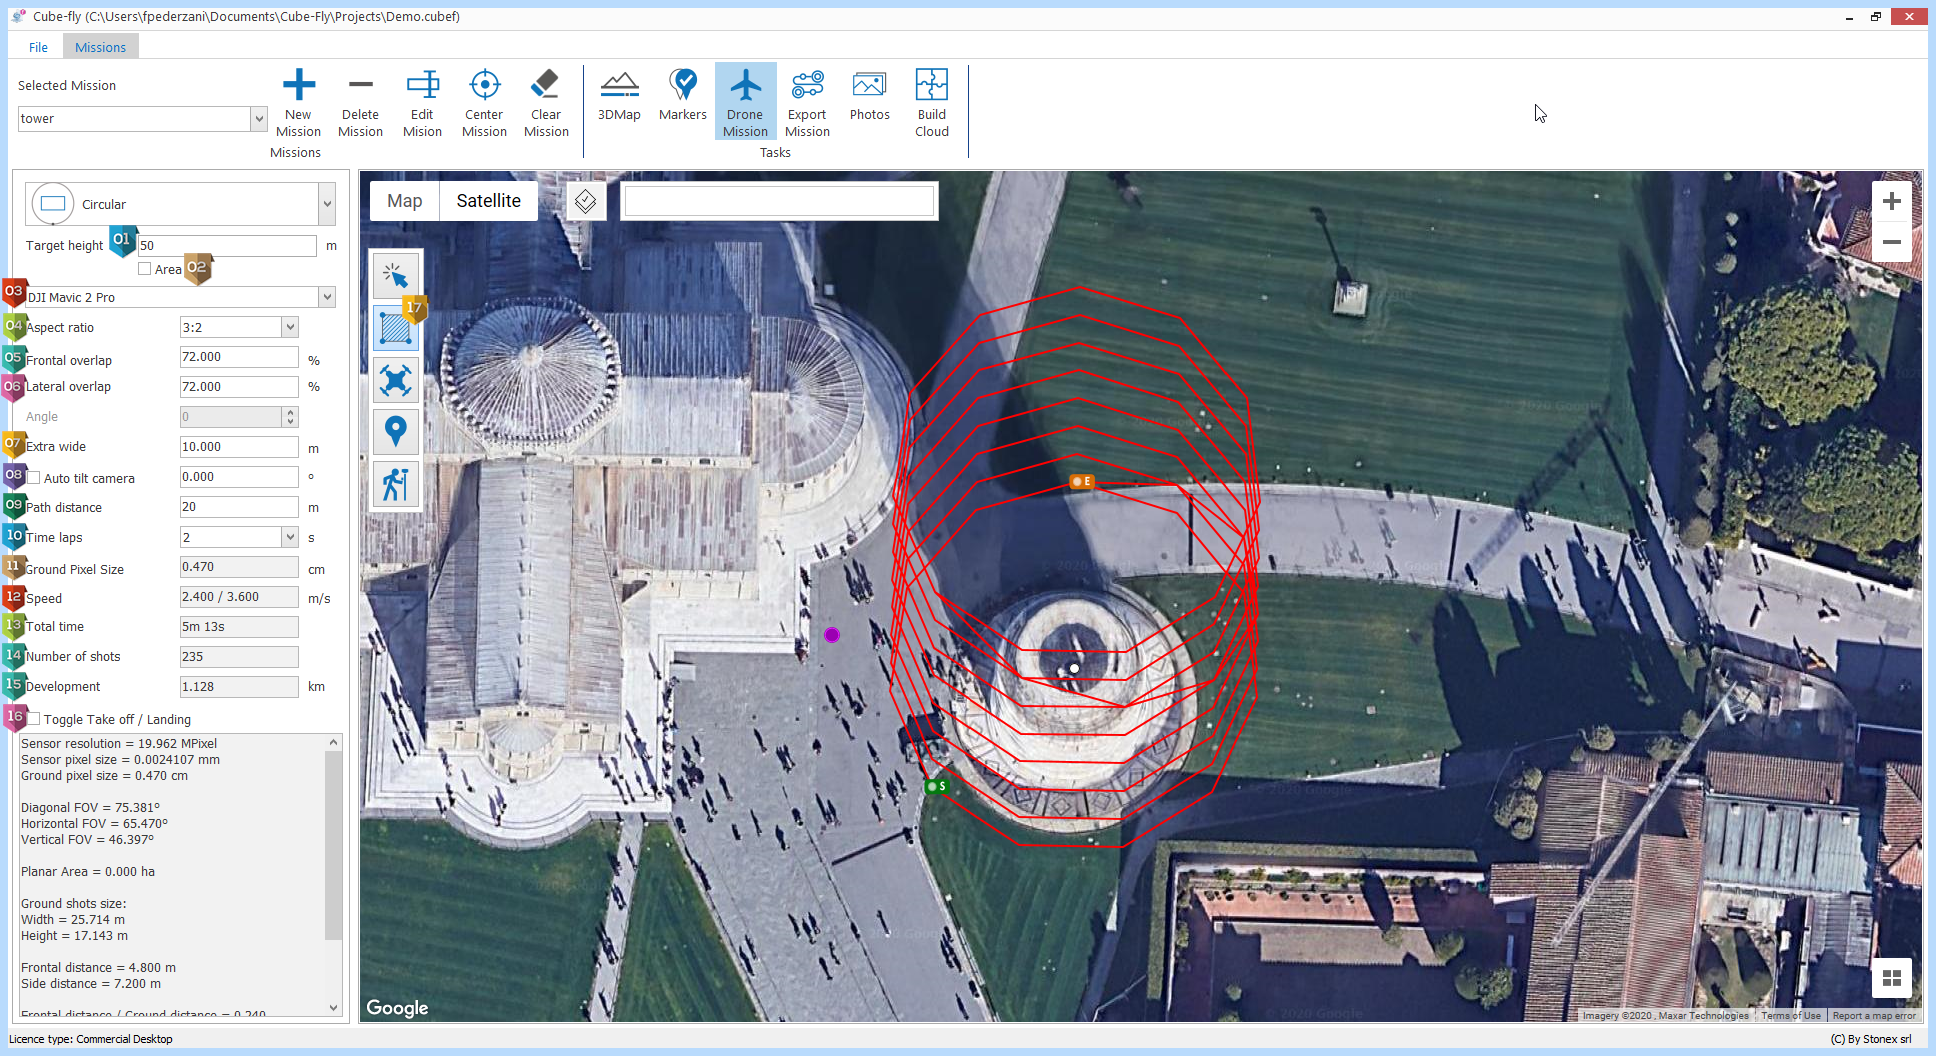
Circular Mission
|
Height of the object you want to survey |
|
Add a normal mission which covers the terrain limited by the vertical mission area. |
|
Camera drone chosen, it is important to select as first because it defines all parameters of drone mission. |
|
Aspect ratio available on the camera. |
|
Front overlap of photos, in this kind of mission we advice to higher this value, the overlap of not parallel shots change from left and right side, can be needed to arrive to 80% or 85%. |
|
Lateral overlap of photos, in this kind of mission we advice to higher this value. |
|
Length of extra path when the drone has to come back on the path, it guarantees to cover fully the path and will turn by a curve instead to stop, rotate and restart with big saving battery and time. |
|
If activated the Tilt will be -20°. |
|
Distance between Drone and circular object. |
|
Time between each shot, bigger values give slower speed and better quality. Note: be careful that this parameter influence also the total time of flight. |
|
Size in cm of one pixel in the photo. |
|
Speed of drone, smaller values gives better photos quality. In general to get a good quality the speed has to be less than 5 m/s, best quality less than 4 m/s |
|
Total flight time without considerate the wind speed. Better to stay to 75% of battery time possibilities taking in consideration the life of the battery. Older they are less it the autonomy. |
|
Approximate number of shots. |
|
Path development length. |
|
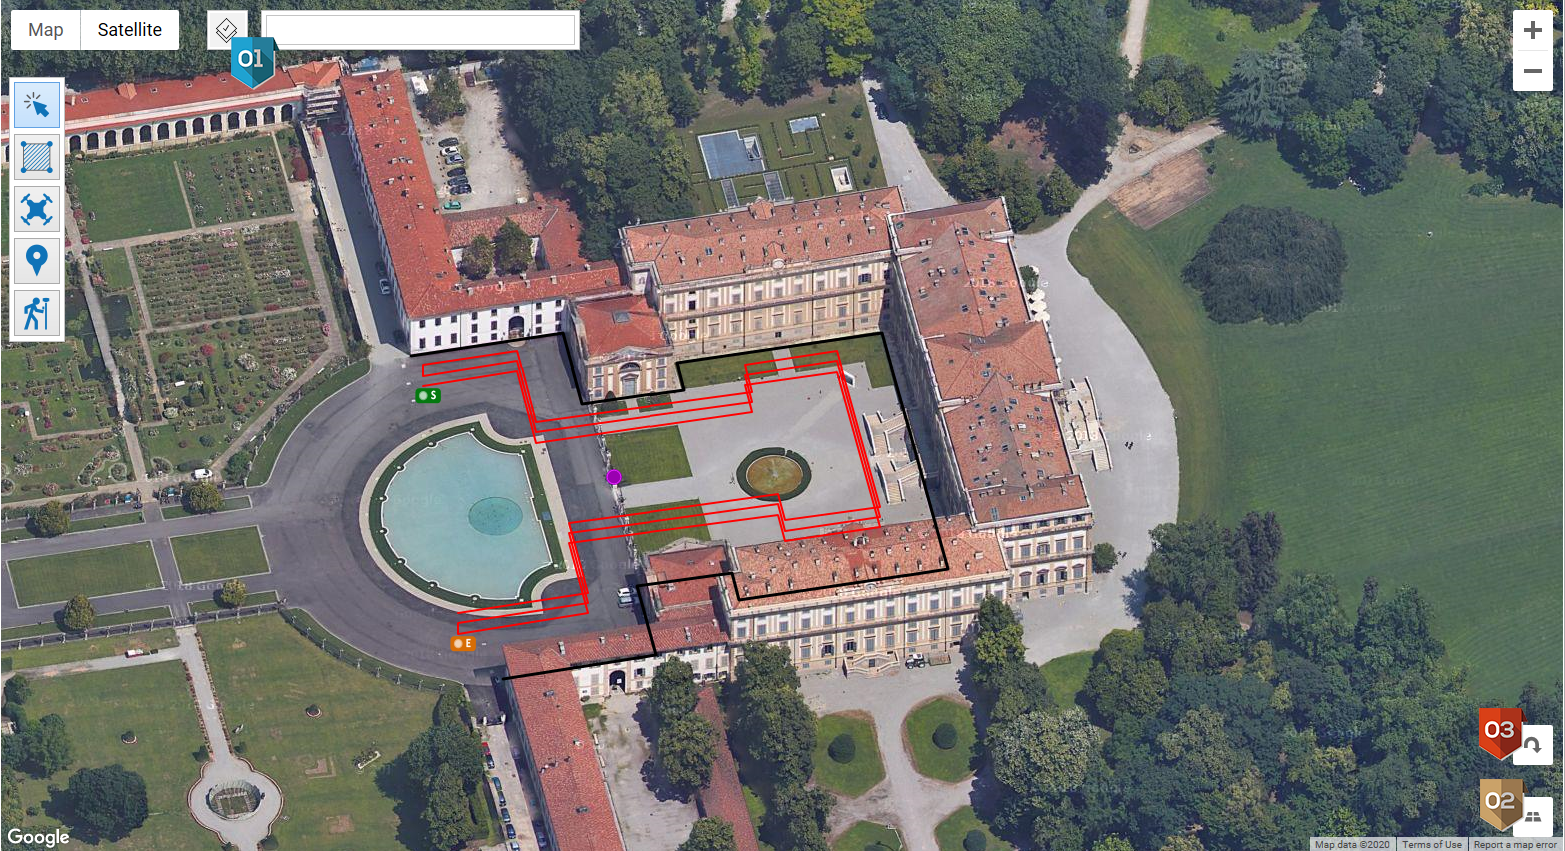
Alternate take off and landing point. In general it is preferable to start from the furthest point and end at the closest point. |
|
Define the center or the circular object by using the "Mission Area" icon. This is the only element to define on the map |


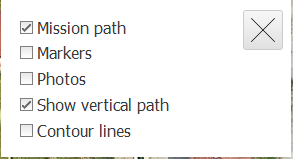
To visualize the 3D mission, check hat you have activated some settings:
|
In the layer settings, check to have activated "Mission path" and "Show vertical path":
|
|
Switch from 3D and 2D views of the map. |
|
If 3D map is activated, rotate it of 90°. |