Sections
Home > 11 Viewing > Sections
Sections
The Sections tab displays the saved sections in the current model. The Manager shows different cameras linked to it for every section. These cameras can be managed in the same way as described in the previous paragraph.
Add a New Section
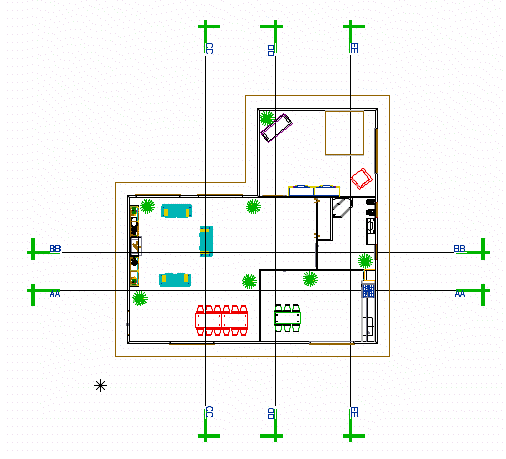
To add a new section, click the Add new button in the Section tab of the Manager. The dialog box is temporarily hidden and the system asks you for two points that shall define the section plane. The sections are represented by two section symbols, a section name and a section line:

As explained above, the sections can be displayed in hidden line mode with the help of the camera settings.
When a new section is created, a camera is associated to it by default. It corresponds to the orthogonal view of the section. Other cameras can be associated to it by using the button:

Section Settings
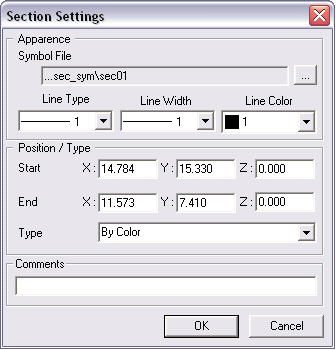
You can access these settings by double clicking on a section name in the Section tab of the Manager. The following Section settings dialog box appears:

The first settings are about the section symbol. By clicking on it is possible to go through the directories of the object library to look for a new symbol. Moreover, it is possible to change the appearance of the section line by changing the Line type, Line width, Line color settings.
The coordinates of the two points through which the section plane passes appear below. You can edit these values here.
The Type setting defines the method used for the first lines cleaning.
Like for the cameras, you can add a comment to the section as well.
