Editing Your Roof
Home > 23 Roofs > Editing Your Roof
Editing Your Roof
You may modify the roof perimeter and roof attributes for the entire roof or separate roof plates.
Modifying the Roof Perimeter Polygon
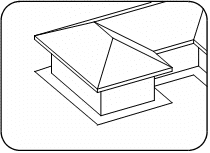
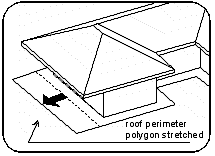
Modify your roof by redrawing the perimeter polygon.
To modify the perimeter:
IMPORTANT: In plan view, the outline of the roof is superimposed on the roof polygon perimeter. To view the perimeter, set the display to axonometric or perspective view.
Indicate a perimeter edge and modify it using the basic polygon, line creation, editing and help line commands as necessary.
Select the update edge button to regenerate the plate.
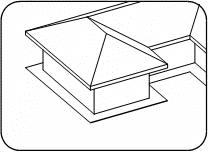
The perimeter is repositioned and the slope of the roof is adjusted accordingly.
Deleting the Entire Roof or a Roof Plate
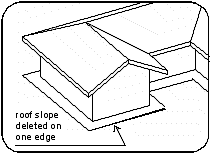
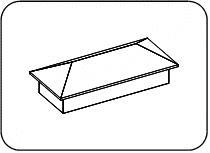
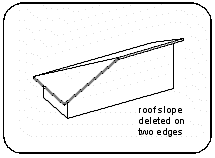
The entire roof or individual roof plates may be deleted. When deleting a roof plate, the roof is regenerated and the walls are extended to the underside of the adjacent roof plates. The dimensions of these plates are resolved accordingly. The roof perimeter polygon edge remains active and may still be used to regenerate roof plates.
To delete a roof plate:
Select the delete edge button.
Indicate the edge of the roof polygon perimeter where the roof plate will be deleted.
To delete the entire roof, select the delete all button.
Modifying the Roof Slope
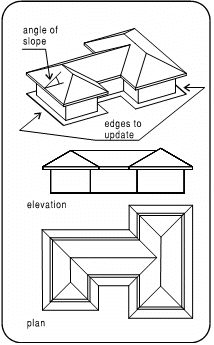
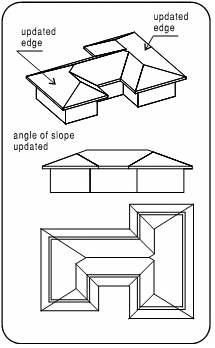
You can modify your roof by changing the angle or gradient of the slope for the entire roof or separate roof plates.
To update the slope of the roof:
Change the slope by angle or gradient in the slope field.
Select the all edges button to adjust the slope of the entire roof.
Select the update edge button to adjust the slope of a roof plate and indicate the edge of the roof perimeter polygon where the plate will be updated.
The slope of the adjacent plates and the affected roof perimeter are updated accordingly.
Modifying the Eaves Height
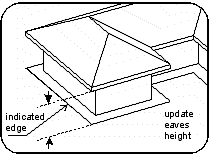
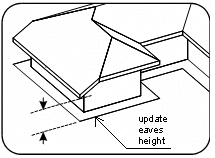
The eaves height is the distance between the underside of the roof at its outer most point and the roof polygon perimeter.
Modifying the eaves height of an individual plate has the following effects on the model:
Repositions the starting point of the slope for the selected plate and resolves the remaining plates accordingly.
Updates the height of the wall on indicated edge.
Modifying the eaves height of the entire roof only updates the height of all the walls. The roof slope is not affected.
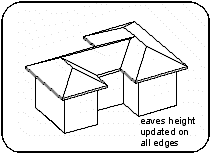
To modify the eaves height:
Insert the eaves height in the eaves height field.
Select the all edges button to adjust all the walls.
Select the update edge button to adjust a specific wall and indicate the edge of the roof perimeter polygon where the plate will be updated.
Redefining the Slope and Eaves Height:
The slope and eaves height of an individual roof plate or the entire roof can be redefined simultaneously. This procedure has different effects of modification of the slope and eaves height in two stages.
In addition, a roof plate must be deleted before modifying the slope and eaves height. Updating the slope and eaves height of an existing plate creates a multiple plated roof.
To update the slope and eaves height of a roof plate:
Select the delete edge button.
Indicate the polygon perimeter edge where the roof plate will be deleted. Confirm to delete the edge.
Update the slope and eaves height fields.
Select the update edge button and indicate the edge where the plate will be updated.
To modify the slope and eaves height of the entire roof, update the slope and eaves height fields and select the update all button.
Creating Multiple Sloped Roof Plates
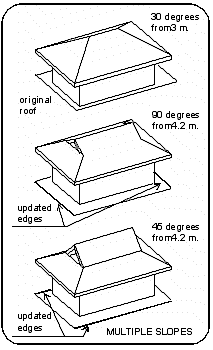
Create roof plates with multiple slopes by assigning a different slope at various starting points (eaves height values) along the plate. Each slope becomes a separate roof plate.
IMPORTANT Multiple slopes are created separately for each roof plate, using the update edge button. They cannot be created using the update all button.
To create a multiple sloped roof plate:
Update the slope and height fields for the required plate.
Select the update edge button.
Indicate the polygon perimeter edge where the slope will be added.
The slope is changed at the starting point (eaves height value) indicated.
Edit the plate using the dialog box options or delete it using the Delete an entity (\dele) command.
Defining Roof Parameters for Models with More than One Story
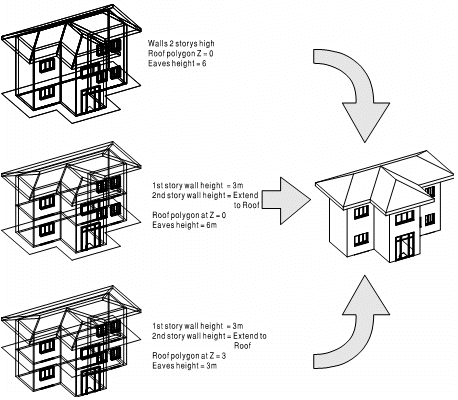
Various options are available for setting the wall height and related parameters in models that are composed of more than one story. For example, the exterior walls of a two story building (height=6m) may be comprised of two 3m walls (wall height=3m) or one 6m high wall.
The perimeter polygon must be at the base level of the walls, but if each floor is composed of separate walls, the perimeter may start at the z-level of the second floor. The eaves height is set accordingly. Remember that the height of the walls must be set to extend to roof before generating the roof, so that the walls can be regenerated to join the roof properly.
