Tutorial for using
LEAD TWAIN Scan Configuration
Utility
This utility will help you determine the best scan configuration for your TWAIN
scanner. This utility can be used to test all possible scan configurations for
your TWAIN Data Source or test a specific scan configuration that you can select.
After the utility has successfully completed testing the configuration(s), the
utility will report to you the best scanning configuration for your TWAIN Data
Source. You can then use that configuration when acquiring images in order to
get the best performance from your TWAIN scanner.
Note, this utility has the ability to continue any previously aborted/failed
configuration test.
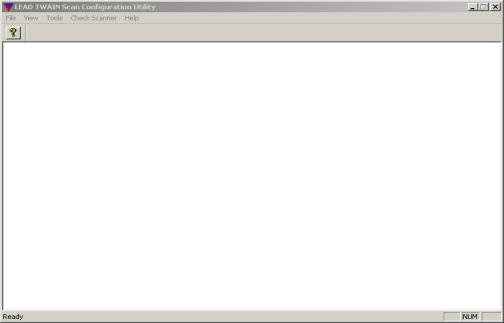
The following image shows the Main Window of the utility:
The following is a description of the utility's menus:
1. File menu:

This menu contains the following item:
- Exit: to end the utility application.
2. View menu:

This menu contains the following items:
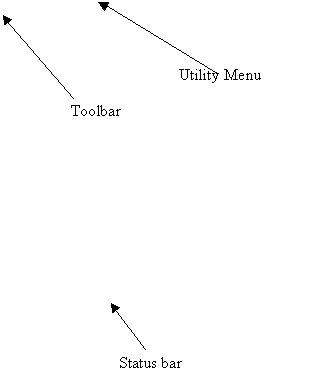
- Toolbar: Shows or Hides the toolbar.
- Status Bar: Shows or Hides the status bar.
3. Tools menu:

This menu contains the following item:
- Options: This item will display the Configuration Options dialog.
The following image shows the Configuration Options dialog:
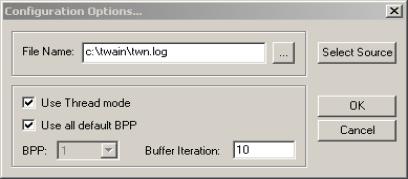
You must enter values in this dialog before pressing OK. These options will
be used in testing your TWAIN Data Source configurations.
The following is a description for the Configuration Options dialog items:
File Name edit box: You must enter a LOG file name. The configuration
results will be written into this file. Also the utility will save the acquired
images that were created during testing into the same folder as the LOG
file.
Browse button: You can press this button to select the LOG file that
will be used.
Select Source button: When you select this button, a TWAIN
Select Source dialog will be displayed, that allows you to select the TWAIN
Data Source for which the configuration tests will be executed.
Use Thread Mode check box: This check box will allow you to enable
or disable Thread mode. With some Data Sources, using a separate thread
of execution can improve your scanning performance.
Use all default BPP check box: Selecting this check box will cause
the utility to check all Bits Per Pixel settings that are supported by the
TWAIN Data Source. Unchecking this check box, will allow you select the
desired Bits Per Pixel for a specific test.
BPP combo box: This combo will contain all supported Bits Per Pixel
settings for your selected TWAIN Data Source. This check box will be enabled
when you unselect the “Use all default BPP” check box.
Buffer Iteration edit box: You must specify how many buffer
iterations that you wish to use during configuration testing. The maximum
setting is 10. The buffer iteration value is used only with Memory Transfer
mode. It determines the buffer sizes to be tested. The idea of testing Memory
Transfer mode with different buffer sizes is to determine the best buffer
size that will give the fastest scan configuration. The buffer iteration
means the maximum number of different buffer sizes that will be tested.
The buffer size is the size of the transferred data from Twain Data Source.
OK button: Ends the dialog, accepting the changes.
Cancel button: Cancels the dialog and ignores any changes.
- Upload DATC File: This menu item will connect to the LEADTOOLS
web site, to allow you to upload the generated DATC file to LEAD’s server.
The DATC file is generated after a successful configuration test.
4. Check Scanner menu:
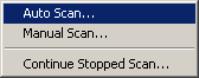
This menu contains the following items:
- Auto Scan:
This menu item allows testing of all possible configurations for the selected
TWAIN Data Source.
This option requires setting the configuration options from the Tools->Options
menu. This option will be disabled until you have set the Options.
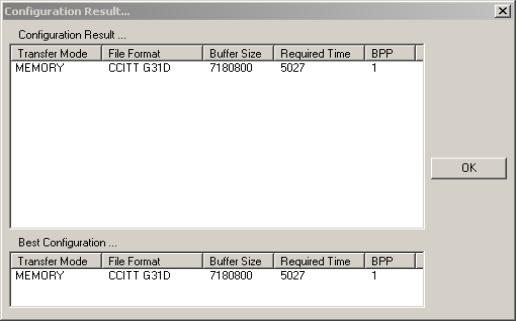
After the Auto testing process has finished, the results for all tested configurations
will be displayed in a dialog box as shown by the following image:
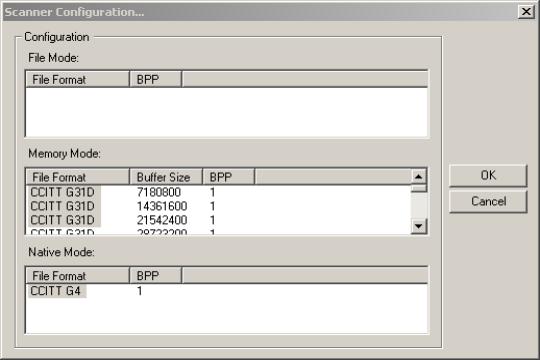
- Manual Scan:
This menu item allows testing only selected configurations for the selected
TWAIN Data Source.
This option requires setting the configuration options from the Tools->Options
menu. This option will be disabled until you have set the Options.
When you select this menu item, a dialog box will be displayed as shown in
the following image. This dialog will contain all possible configurations
and allow you to select the configurations to be tested.
After the Auto testing process has finished, the results for all tested configurations
will be displayed in a dialog box as shown by the following image:

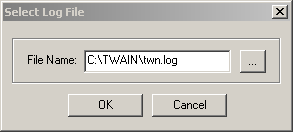
- Continue Stopped Scan:
This item allows you to contine a previously aborted configuration test.
When selecting this item, the following dialog box will be displayed:

You must enter the filename of the LOG file that was being used during the
aborted test, then press OK. The utility will find the aborted configuration
and will try to continue that stopped process. When the process is successfully
completed, the utility will display informatin about the results in the same
manner as indicated above (Auto & Manual).
5. Help menu:

This menu contains the following items:
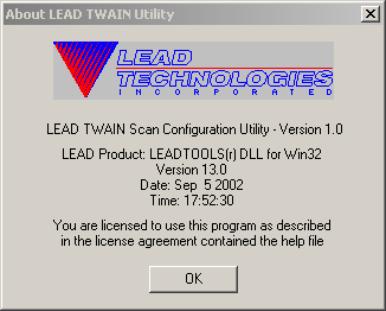
- About:
This menu item will bring up an About Box for the utility.
The About Box dialog box is shown in the following picture:
- Utility Instructions:
Displays this document.