Image Manager
Home > 25 Raster Support > Image Manager
Image Manager
This command enables you to manage the embedded images of your current model.
\imgmng
The Image manager is a floating dialog box (like the Cameras and Section Manager and the Layer Manager…) that can be displayed on the screen at all times.

The image manager enables you to view and manage all the raster images of your model. This is a quick and practical way to view all the "child" frames of an image, their location in the model and the changes applied to them. It is imperative to delete an image using the image manager to ensure its permanent deletion from the database of the model.
The File range enables you to view all the images embedded in the current model. When you insert a new image in ARC+ (by using the Insert Image command) the system performs two actions:
Embedding the raster image in the ARC+ database.
Displaying the embedded image as frame with size and proportions as specified by the user.
The original raster image that is embedded in the model is called "Father". It is displayed in the image manager as a folder. One or two frames are always attached to this folder:
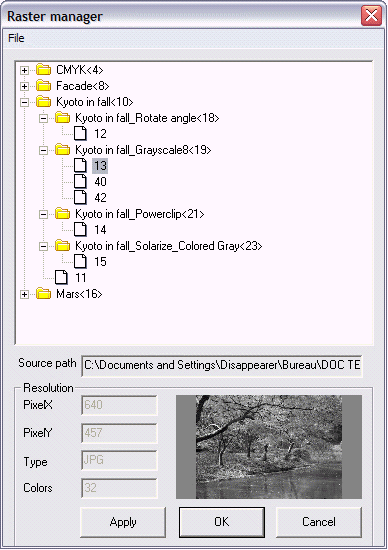
 - The name of the raster image ("Father") is "Facade". It is displayed as folder and contains a frame displayed as file. The digits "8" and "9" are the numbers of the entities in the ARC+ database.
 - The name of the raster image ("Father") is CMYK. It is displayed as folder and its entity number in the database is 4. This folder contains 3 frames (5, 6 and 7) displayed as files.
When you edit an image, ARC+ creates a "Child" copy of the original "Father" image. This "Child" copy is also displayed as folder and can contain one or many frames displayed as files. The "Child" folder is a subfolder of "Father" which is the original inserted image.
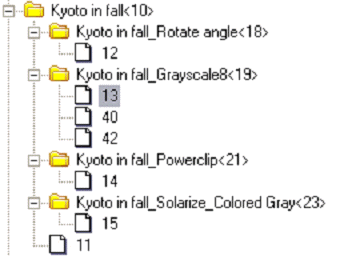
 The "Father" image is "Kyoto in fall" <10>. It has a frame that has not been changed - file "11". It has four "child" copies (18, 19, 21 and 23). Some "child" copies contain several frames (19 contains 13, 40 and 42 as frames of the same modified image). One of the "child" copies has been modified twice (23). Note that the name of the child refers to the modifications applied to it (in this case– Solarize and Colored Gray).
The selected frame is displayed at the bottom of the dialog box. Its size settings, color resolution (BPP), type and path are also displayed here.
The File pull-down menu of the image manager contains six file management commands:
Delete – deletes the selected (highlighted) frame(s) or folder(s).
Refresh List– refreshes the file list to display the latest modifications made to the model.
Reverse Selection – Reverses the selection (the selected images are deselected and vice versa).
Select All – selects all the elements displayed in the list.
Select Unused Elements – Selects all unused raster images in the model.
Cancel – Cancels the most recent command.
To delete an image from the database of the model, select the image to be deleted, and then click delete and then click OK.
